Private beta · Setup guide
Getting started
Create your account, then fill in your timeline in minutes. Import your LinkedIn data, upload a résumé, or add it manually. Here’s the whole path, start to finish.
Part 1
Create your account
- 1
Sign up with your invited email
Use the exact email address your invitation was sent to. If it doesn’t match, sign-up won’t recognize your invite.
- 2
Accept the Beta Participation Agreement
On your first sign-in you’ll read and accept a short agreement. A one-time step, then you’re in.
- 3
Build your timeline
Start from scratch or import your history. The three ways to populate it are right below.
Part 2
Three ways to populate your timeline
Use any one of them, or mix them. Nothing you’ve already entered gets overwritten without your say-so.
Import from LinkedIn
Bring your whole career in from a LinkedIn data export: roles, education, certifications, and skills, all reviewed on one screen before anything is saved.
Upload your résumé
Already have a résumé PDF? Upload it and we’ll read your roles and dates. A quick way to get going while your LinkedIn archive is being prepared.
Add manually
No file needed. Add entries one at a time, or fill gaps the moment you remember them.
The full walkthrough
Import your data from LinkedIn
Stage 1
Request your data archive
LinkedIn: typically 10–15 minutes (allow up to 24 hours).
Stage 2
Import into your timeline
Import time: under two minutes.
Tip: while the archive is being prepared, you can upload a résumé to get a head start, then import LinkedIn on top of it when it’s ready.
Stage 1
Request your LinkedIn data
Do this first. The archive takes a little while to prepare.
Open Settings on LinkedIn
On the LinkedIn website (not the mobile app), click your Me avatar at the top-right, then Settings & Privacy.

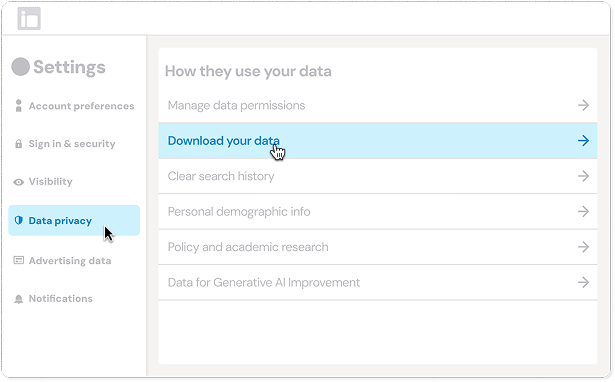
Go to “Download your data”
In the left menu open Data privacy, then click Download your data.
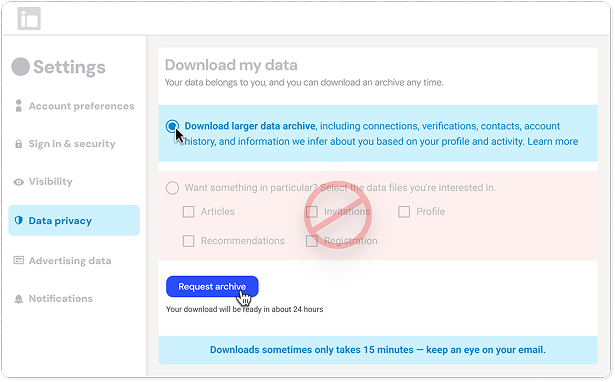
Request the larger archive
Choose Download larger data archive, not the “specific files” option, then click Request archive.
Don’t skip this. Only the larger archive includes your Positions, Education, Skills, and Certifications. The quick “specific files” option leaves them out.
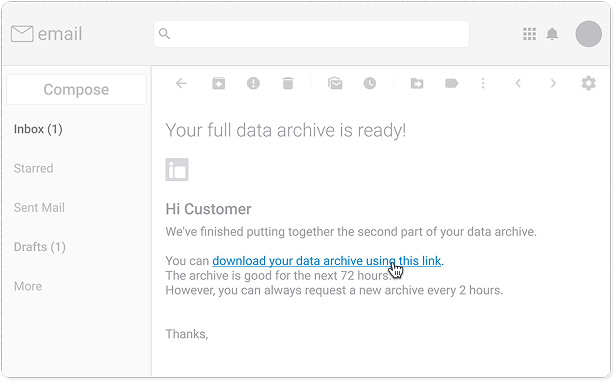
Wait for the email
LinkedIn emails you when the archive is ready, usually 10–15 minutes and occasionally up to 24 hours. Open the link in that email.
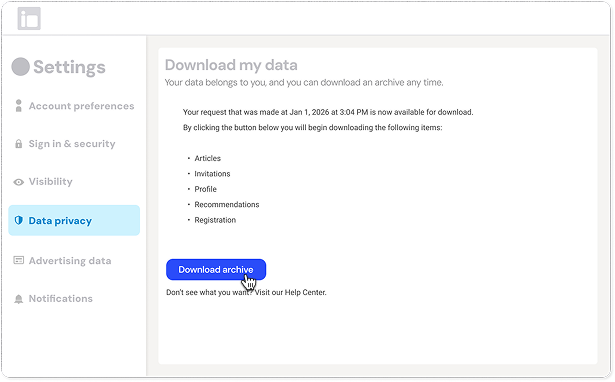
Download the archive
Back on Download my data, click Download archive and save the .zip to your computer.
Leave it zipped. You’ll upload the whole file.
Stage 2
Import into your timeline
Once the .zip is on your computer, this part is quick.
Start the import
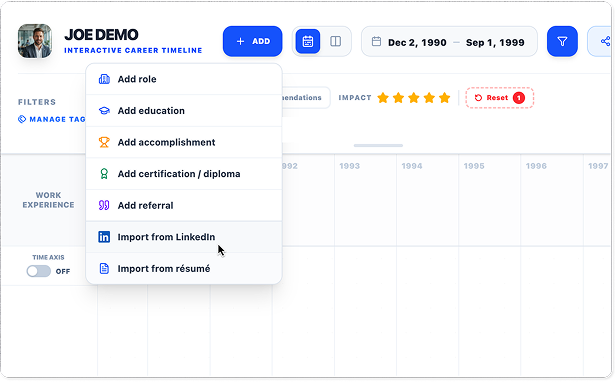
In Career Timeline Pro, click Add, then Import from LinkedIn.
Choose your file
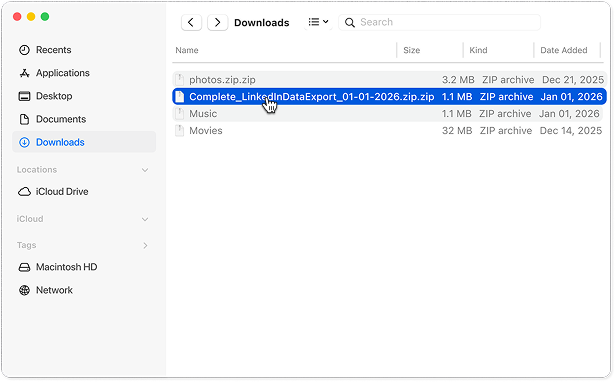
Select the Complete_LinkedInDataExport…zip you just downloaded.
Leave it zipped. You’ll upload the whole file.
Review and import
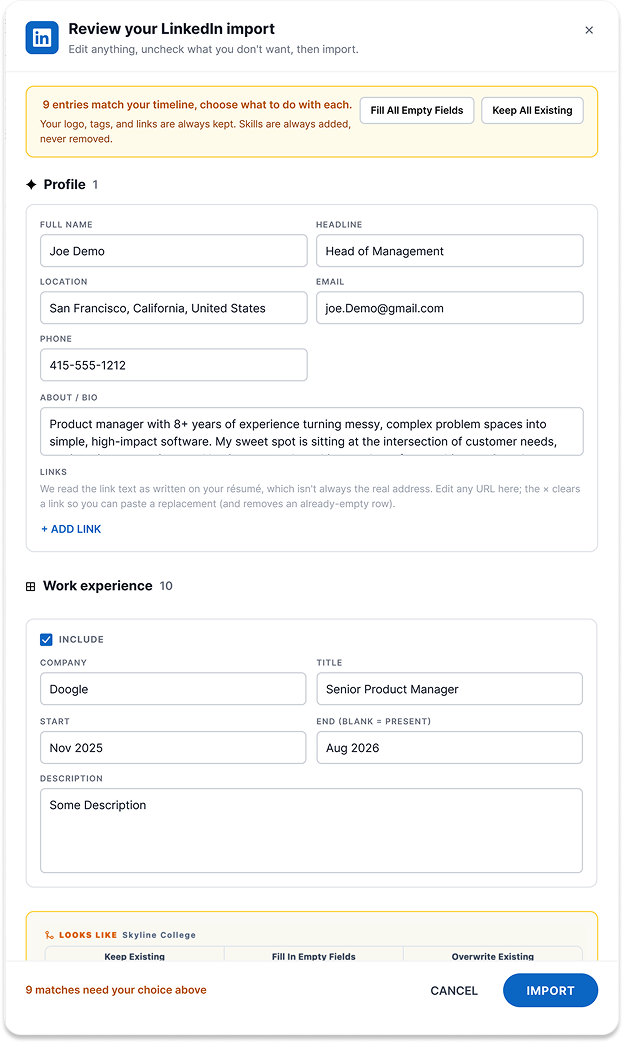
Everything lands on one screen. Edit anything, uncheck what you don’t want, choose what to do with any matches, then click Import.
Bonus
Add an interactive embed
Any long-form field, a role description, an accomplishment’s supporting content, your bio, can hold a live embed: a Figma prototype, a walkthrough video, a Loom. It renders right in your timeline, sized to fit.
How to add one
- 1. On the source (Figma, YouTube, and so on), choose its share or “copy embed code” option and copy the code it gives you.
- 2. Paste it into a description or supporting content field, then save.
- 3. That’s it. The embed appears in place, and viewers of your shared timeline see it too.
Sources that embed
Only these trusted sources embed. Anything else is removed for safety, and links must be secure (https). Every embed is sized automatically to fit the view, whatever dimensions the code came with.
Ready to build yours?
Sign in with your invited email, or request a beta seat.